An invoice is how you ask a family for money. A student can have charges sitting on a held invoice, but until that invoice is published, the family sees nothing to pay.
The invoice is the working page. Charges, payments, credits, refunds, the plan and its dates, splitting, holding and publishing all happen on the invoice they act on. To read what a student or a family owes across all of them, see What a Student Owes.
When invoices are created automatically
TeachHero does most of this for you. When a family enrolls and checks out:
- Fees set to Immediately at checkout are charged at checkout and a payment receipt is created.
- Remaining "pay later" fees land on an invoice automatically so they can be collected later.
- If the parent chose a payment plan at checkout, the invoice uses that plan and each payment date is charged on its date.
- Fees set to On a specific date get their own invoice due on that date, separate from the payment plan. It is published — and starts collecting by autopay and reminders — when the enrollment completes. Fees that share a due date land on one invoice per student. See Managing Fees.
Enrolling a student from the Admin panel works the same way. Bill the standard fees on the enrollment form puts the term's standard fees and automatic discounts on the family's invoice right away. Leave it off to enroll without billing anything — see Enrolling a Student. If you want to check the charges before the family sees them, hold the invoice first; see Hold and publish below.
If the student is on a payment plan for the term, their charges land on two invoices instead of one: fees due immediately collect on their own invoice due today, and everything a plan can cover collects on the plan's invoice. See Payment Plans.
You only need to create an invoice by hand for charges that don't come from an enrollment.
Create an invoice
- Go to Billing → Invoices.
- Click New invoice.
- Enter an Invoice number, or click Generate to use the next available number.
- Select the Student — search by name. Only students still on the roll are offered.
- Select the Term the invoice belongs to. An invoice tied to no term never reaches the family's portal, so this is required.
- A Billed to field appears once a student is chosen, pre-filled with the first parent in their family. Pick a different family parent if needed.
- Set the Issued on date.
- Tick Hold as draft to keep the invoice hidden from the family while you add charges. Leave it unticked and the invoice is published as soon as it has a charge on it.
- Click Create.
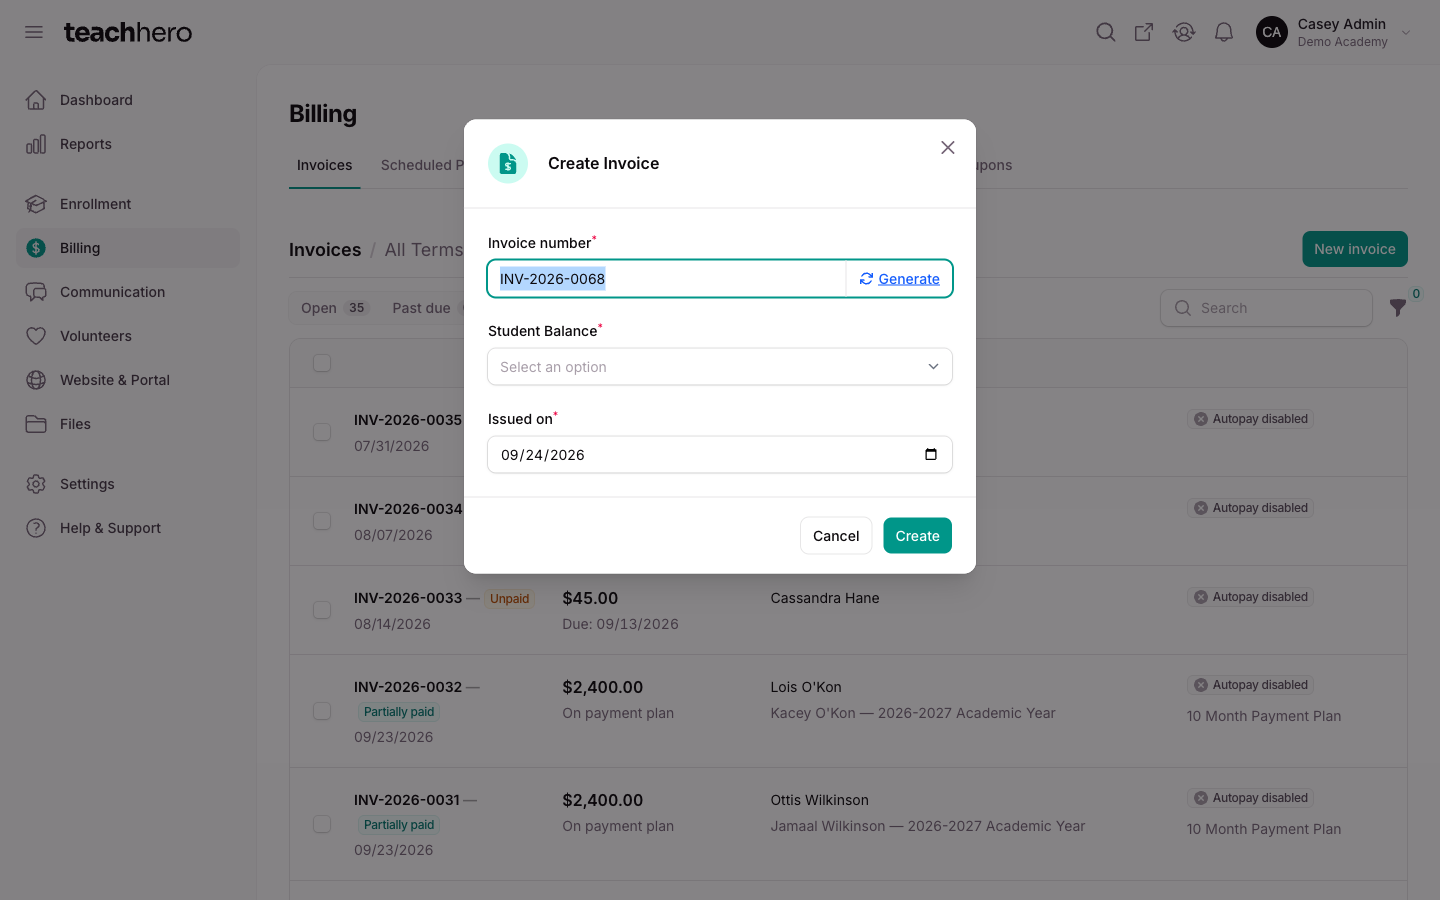
You land on the new invoice's page, ready for its charges.
The invoice page
Open an invoice by clicking its row on Billing → Invoices, or from the Invoices panel on the Billing tab of the student's page (Enrollment → Students) — see What a Student Owes.
The page is headed with the invoice number, its status, and its due and issued dates. Under them the header lists who the invoice is Billed to, the Student, the Term, the Payment plan, the Accepted payment methods, when it was Published (DRAFT while it is held), and the Memo when there is one. Two buttons sit at the top. Record payment opens a panel at the side of the page to charge a saved card or bank account, or record a check, cash, or other payment; it appears while the invoice is open, and the Applied payments tab has the same form behind its Apply payment button. Publish appears next to it while the invoice is a draft with at least one charge — that is the one thing a draft is waiting for, so it leads the page rather than sitting in a menu.
Manage beside them holds everything else:
- Refund — return money from a payment that landed on this invoice's charges. It appears while one of those payments can still be refunded.
- Edit invoice — the invoice's number, issued date, and memo, plus the payer, the payment plan, the interest rate, the payment dates, reminders, and accepted methods, all in one form. It appears unless the invoice is closed, uncollectable, or archived.
- Hold — take a published invoice back out of the family's view. It appears while the invoice is open and no money has been applied to it.
- Download PDF — a copy of a published invoice. The PDF names the student and term in its header and lists each charge by fee name.
- Audit log — a unified history of payments, refunds, credits, payment dates, and changes made to the invoice.
- Close invoice — choose Closed or Uncollectable. Autopay and reminders are switched off either way. Closed takes the invoice off the family's balance; Uncollectable leaves the charges on the balance but stops collecting. Its charges stay on the document.
- Archive — hides a paid or closed invoice from the default list (reversible with Unarchive).
- Delete — held invoices only.
Warning: Closing an invoice can't be undone, whichever status you choose.
On an open invoice, an autopay alert sits above the totals. While autopay is on it's green and names the next automatic payment: the amount, the saved card or bank account it goes to, and the date. While autopay is off it's gray, and when a failed payment turned it off it says so, with the reason. Turn off autopay or Turn on autopay in the alert switches it after you confirm. Turn on autopay asks which of the payer's saved cards or bank accounts to charge. Any saved method the invoice accepts is offered, not only the payer's default, and the button is grayed out until the payer has one.
The totals sit below it: Due now (charges due now plus every payment date that has arrived, less what has been paid against them, and never more than the remaining balance), Total due, Total paid, and Remaining balance. Due now turns red once the invoice is past due. Edit invoice in the Manage menu opens the invoice's one edit form (see Edit invoice below).
Four tabs follow, opening on Charges:
- Charges — every live charge and discount on this invoice, grouped by the enrollment it charges. Charges that belong to the whole invoice — plan interest, say — sit at the bottom under Other charges. Each row shows its Item, when it is Due (Upfront, With first payment, Payment plan, or a date; a discount follows its fee and shows none), and its Status (Paid, Due now, Past due, Scheduled, Held, Closed, or Nothing owed) with its Paid and Remaining beside the Amount. Each group ends with its Subtotal, Paid, and Remaining, and the table ends with the invoice's Total. Click an enrollment's heading to collapse its charges and keep just those totals in view; every group opens again when you reload the page.
- Payment dates — what is due when, with the Amount due, Paid, Remaining, and status on each row. Upfront charges comes first with everything due now, then each charge due on a specific date, then one Installment row per payment date for the rest of the invoice. Money counts toward the upfront charges first, then the dated charges, then the installments in date order. A pin beside an installment's Amount due means that amount was set by hand in Edit invoice; the plan spreads the rest of the invoice across the dates that aren't pinned.
- Applied payments — one row per payment that reached this invoice, with the payer, date, status, and what it contributed net of refunds. Apply payment in the tab's header opens the same form as Record payment at the top of the page. A payment still shows here when the charge it landed on is no longer one of the live charges above — a charge for an enrollment that was never completed, say.
- Applied credits — one row per charge covered by a credit memo, grouped under that memo's number and reason. Each row shows the Charge and the Amount applied; each group ends with its Subtotal, and the table ends with the tab's Total. Apply credit in the tab's header puts one of the student's credit memos against the invoice, or creates a new memo on the spot. It's grayed out unless the invoice is open. Manage on a row holds Edit, which changes how much of the credit sits on that charge, and Remove, which takes that charge's share back to the memo.
Add charges and discounts
On the invoice page, use the Charges table.
- Click Add charge to charge something: choose Apply to enrollment, a Fee type, an Amount, and when it is Due, then click Add charge. The charge lands on this invoice.
- To reduce a fee, open the actions menu on that fee's row (the ... button) and choose Add discount. Pick a Discount type and the Amount (the dollar value to subtract), then click Add discount. The form shows how much of the fee is left to discount.
- To change when a charge is collected, open the actions menu on its row and choose Change due. Pick Upfront, Due with first installment, Spread across the payment plan, or Due on a specific date with its Due date, then click Save changes. The fee's discounts move with it, and the invoice's payment dates are worked out again.
- The row's menu also holds Change amount and Delete. Delete is disabled, with the reason in its tooltip, when money has already landed on that charge.
- To move a charge off this invoice, open the actions menu on its row and choose Move to another invoice. Move to always offers New invoice — one for this student, billed to the same payer and paid the same way, which Hold as draft keeps out of the family's view until you publish it — followed by the student's other invoices for the term that are still open and not on autopay. Charges move one at a time.
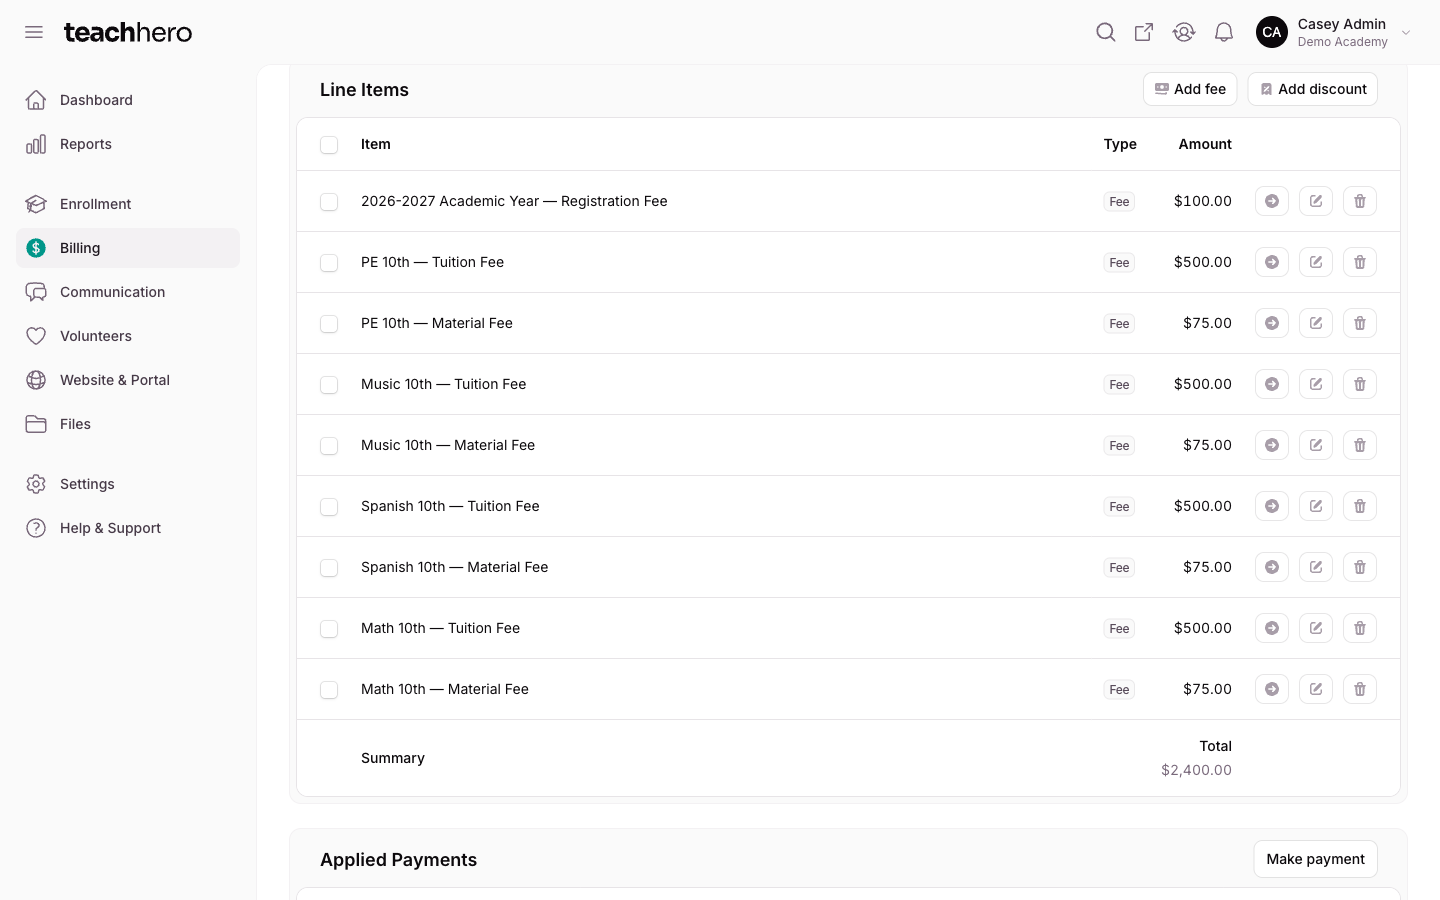
Note: You can change charges while autopay is on. TeachHero recalculates the payment dates after each change, so the next automatic payment reflects it.
New charges from enrollment and checkout land on whichever of the student's invoices for that term carries the New charges land here badge. The badge is on the Invoices panel on the Billing tab of the student's page, and Manage → Make default there moves the marker — see What a Student Owes.
Hold and publish
Publishing is what hands an invoice to the family. A held invoice is invisible to parents, is never charged by autopay, and doesn't count toward the student's balance or accounts receivable — so a held invoice you forget about is money you never asked for.
- Publish, at the top of the invoice page, puts the invoice in the family's portal and counts it toward the balance. It appears once the invoice is a draft and has at least one charge.
- Hold, in the Manage menu, takes a published invoice back out of the portal and out of the balance, and reopens it for editing. It appears only while the invoice is open and no money has been applied to it. Once a payment or credit lands, hold is off the table — close the invoice or adjust its charges instead.
Publishing doesn't email the family. The invoice appears in their parent portal, and what reaches them by email is payment reminders (when Enable reminders is on) and payment receipts.
Each invoice is held and published on its own.
To find the invoices still waiting, use the Draft pill on Billing → Invoices. Its count is every held invoice in the school, and each one is published from its own page.
Edit invoice
Edit invoice, in the Manage menu, is the one place an invoice's details and payment settings live. It opens in a window with three tabs — Details, Payment plan, and Payments — and Save changes saves all three at once.
Details
- Number — the invoice number. It can only change while the invoice is held.
- Issued on — the date shown on the invoice.
- Billed to — who is responsible for this invoice. The list is the student's family parents plus whoever pays the invoice now, so a grandparent or a parent in another family is never dropped.
- Memo — a note shown on the invoice.
Payment plan
- Use payment plan — turn off to make the invoice payable in full.
- Payment plan — pick one of the term's plans, or leave it as Custom and set the dates yourself below. Changing the plan or the Interest rate recalculates the schedule, and the due date moves to the last payment date.
- Due on — the due date, for pay-in-full invoices.
- Payment dates — one row per date, each with an optional Pinned amount. Leave a pin empty and the plan spreads the rest across the open dates. A date with money settled against it can't be removed. Pinned amounts can't add up to more than the payment dates hold — the invoice's total less what's due now. If a later charge change leaves them adding up to more, every pin on the invoice is cleared and the dates share the plan again.
Payments
- Enable reminders — send the payer payment reminder emails for this invoice.
- Accepted payment methods — Credit/Debit Card and/or ACH Direct Debit. An older invoice that never had any chosen accepts both, so both start ticked.
Each invoice keeps its own settings, so a student with two invoices is edited one invoice at a time.
Autopay isn't in this form. Switch it on or off with Turn on autopay and Turn off autopay in the autopay alert at the top of the invoice.
When autopay is on, the invoice is charged automatically on the due date — or, on a payment plan, on each payment date. If the payer has no usable payment method of an accepted type, TeachHero turns autopay off automatically. See Why didn't a parent get charged? if a charge didn't happen.
Take a payment
Click Record payment on the invoice (or, from Billing → Payments → Received, click Record payment, choose the invoice, and click Continue) to charge or record a payment:
- Choose Pay what's due now (shown when the invoice has payment dates), Pay the full balance, or Enter a different amount. Each option shows its amount; with the third, type the Amount.
- Confirm Paid by — it starts as the invoice's payer.
- Choose the Payment Method: Credit/Debit card, ACH Debit, Check, Cash, or Other.
- For a card or ACH, pick one of the payer's saved methods and tick the confirmation line. For a check, cash, or other payment, set the Date received.
- Click Process payment for a card or ACH, or Record payment for the others.
The payment is spread across the invoice's charges in proportion to what each one still owes.
To put the payment toward particular charges instead — say a sponsor is covering one class — tick Apply to specific items and set the amount for each charge before you submit. The amounts must add up to the payment. See Payments for how the split carries through to balances, receipts, and reports.
Every payment that reached this invoice is listed on the invoice's Applied payments tab.
Apply a credit
On the invoice's Applied credits tab, click Apply credit — it's grayed out unless the invoice is open. Pick the Credit memo, or create a new one from the field, and enter the Amount. To send it to specific charges, tick Apply to specific items and set an amount for each charge, adding up to the amount applied; left unticked, the credit fills upfront charges first, then dated charges, then the first payment, then the plan. The credit counts like a payment — it reduces what is still owed, can settle the invoice, and flows through to the student's balance. Each covered charge gets its own row on the Applied credits tab, and Manage on a row lets you Edit how much of the credit sits on that charge or Remove that share, returning it to the memo. See Credits.
Split charges between two payers
One parent pays tuition, the other pays the trip. Split the charges across two invoices and address each to its own payer.
- On the Charges table, open the actions menu on a charge that belongs to the second payer and choose Move to another invoice.
- Under Move to, choose New invoice — for this student, billed to the same payer and paid the same way — and leave Hold as draft ticked so you can check it before the family sees it.
- Click Move item. Repeat for each remaining charge, picking the invoice you just created this time.
- Open the new invoice, click Edit invoice, and set Billed to to the other payer. The list is the student's family parents plus whoever pays the invoice now.
- Click Publish when it's right.
Both invoices keep the same payment plan, their schedules are worked out again, and the new one gets a page of its own with its own charges, dates, and payments. It joins the student's other invoices for the term, and each payer sees only their own invoice in the parent portal.
Note: New charges keep landing on the invoice they were already landing on — the one badged New charges land here — so splitting one invoice doesn't redirect the next. If a charge lands on the wrong invoice, move it with the row's actions menu → Move to another invoice.
Invoice statuses
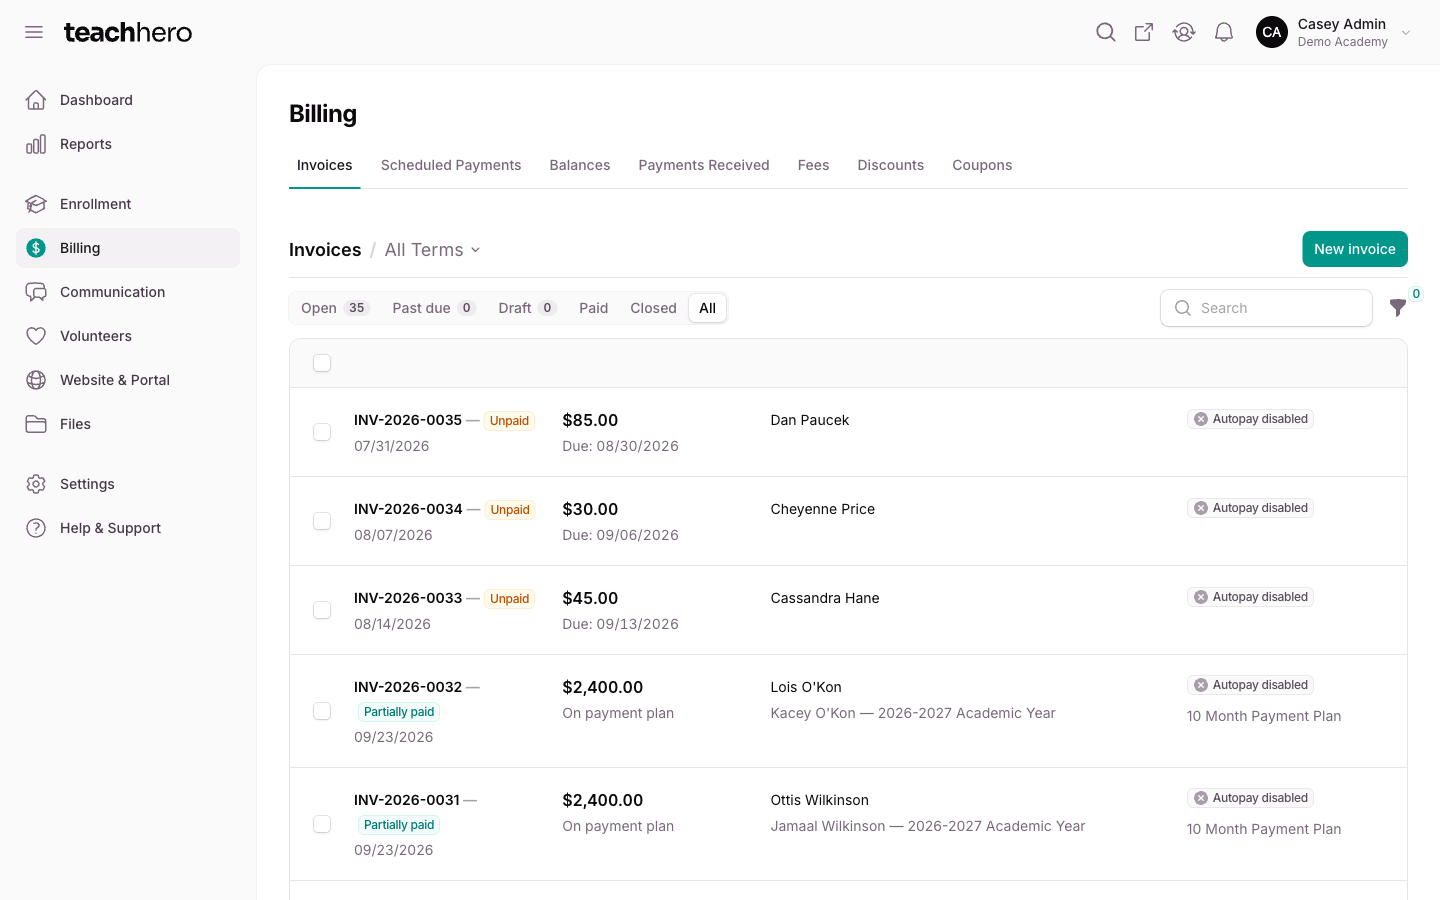
The Invoices list has filter pills for Open, Past due, Draft, Paid, Closed, and All. Click a row to open the invoice. Individual invoices show one of these statuses:
- Draft — held; invisible to parents and outside what the student owes.
- Unpaid — published, nothing paid yet.
- Partially paid — some payments applied.
- Processing — a payment is in flight (common with ACH).
- Paid — paid in full.
- Past due — unpaid past the due date.
- Closed / Uncollectable — the school has stopped collecting; excluded from accounts receivable.
The Filter results button above the table opens a panel with a Published filter for splitting held invoices from published ones, alongside filters for due and issued dates, autopay, reminders, payment plan, and archived invoices. Autopay, reminders, and publishing are each set on the invoice itself.