Payment plans let families spread the cost of enrollment across scheduled payment dates instead of paying everything up front. Plans belong to a term. Parents pick one at checkout, and you can pick one for them when you enroll a student from the Admin panel. Paying in full is always an option.
Create a payment plan
- Go to Enrollment → Terms and open the term.
- Find Payment Plans on the term's page.
- Click Add.
- Enter a Plan name — families see this name at checkout, so something like "4 Monthly Payments" works well.
- Optionally enter an Interest rate percentage (for example 1.5). Interest is calculated on the total being financed and added to the invoice's total.
- Under Installment dates, click Add date for each payment date. These are the dates money comes due; TeachHero shows them in chronological order.
- Click Create.
The table shows each plan's interest rate, number of payment dates, and first and last dates. Because plans belong to a term, they cover everything a student enrolls in for that term — classes and programs included. You don't attach plans to individual classes or programs.
Edit or delete a plan
Click the pencil icon on a plan to change it, or the trash icon to delete it. Editing a plan does not change invoices that already use it. A plan that families are already using can't be deleted.
How parents choose a plan
At checkout, each student's order shows a Payment option dropdown listing Pay in full plus every plan on the term. Fees set to Immediately at checkout are excluded from the plan and collected as a deposit; fees set to On a specific date are also excluded and billed on their own dated invoice; fees set to With the first installment are collected on the plan's first payment date; the rest is split across the plan's payment dates. If the family already picked a plan for that term (for example, when adding another class later), the plan is locked so all of the term's plan charges stay on one schedule. See Managing Fees for how each Due option is billed.
Pick a plan when you enroll a student
Every admin enrollment form — the Enroll student slide-over on the Students tab, the Enroll student modal on a class or program roster, and a term's Register Student page — has a Payment plan field.
- Choose the term and the student first. If the student is already on a plan for that term, the field fills in with it, so adding a second class never re-plans the family by accident.
- Leave it on Pay in full, or pick one of the term's plans.
- Finish the enrollment as usual. The plan's invoice is created with its payment dates already scheduled. See Enrolling a Student.
The field is hidden when the term has no plans, and when Bill the standard fees is unchecked — nothing is billed, so there's nothing to schedule.
Note: The plan belongs to the student and the term, not to one class. Every later enrollment into that term lands on the same plan without asking again.
Which invoice each charge lands on
Once a student is on a plan, their term's charges split across two invoices:
- Fees due immediately get their own invoice, due today. Payment plans never cover them — that's the deposit.
- Everything a plan can cover — plan-deferred fees and the discounts that offset them — goes on the plan's invoice, due on its last payment date, with one row per date.
Fees set to On a specific date stay separate as always, on their own dated invoice. A student with no plan gets the single invoice they always did. See Managing Fees for the Due options.
A plan on an invoice
An invoice on a plan gets one row per date, listed as Installment rows on the invoice's Payment dates tab with the amount due, paid, and remaining on each. The schedule always adds up to the invoice's charges; what's already been paid is tracked separately, date by date. With autopay on, each date is charged automatically — see Scheduled Payments for the upcoming charges.
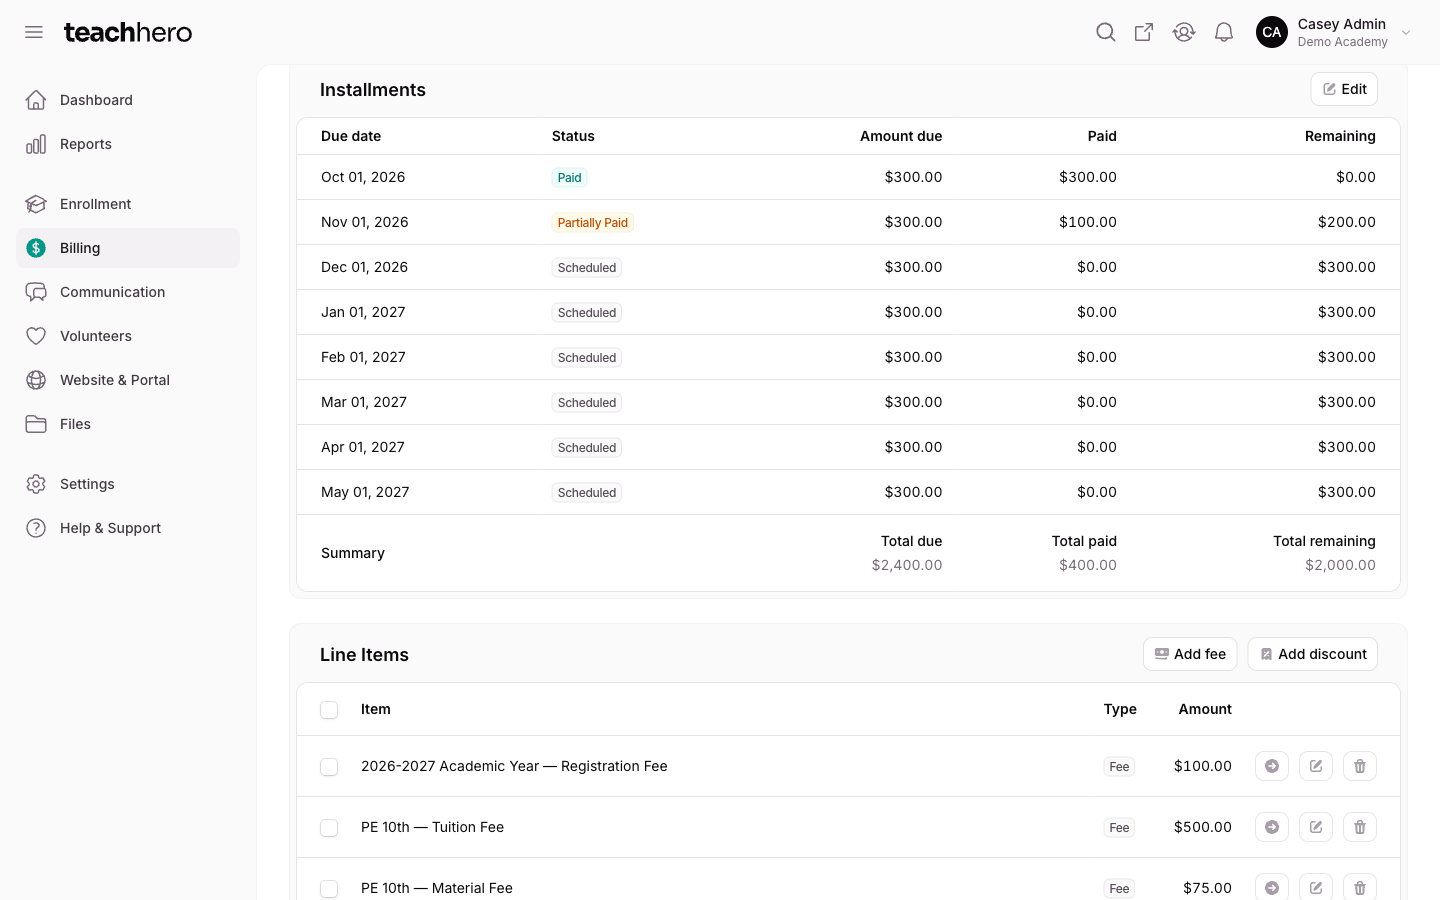
To change an invoice's plan, open the invoice — from Billing → Invoices, or from the Invoices panel on the Billing tab of the student's page — and choose Manage → Edit invoice, then the Payment plan tab:
- Use payment plan — turn off to make the invoice payable in full.
- Payment plan — pick one of the term's plans, or leave it as Custom and add, edit, or remove dates yourself under Payment dates.
- Pinned amount — fix what one date collects. Leave it empty and the plan spreads the rest across the open dates. A date with money settled against it can't be removed. Pinned amounts can't add up to more than the payment dates hold — the invoice's total less what's due now. If a later charge change leaves them adding up to more, every pin on the invoice is cleared and the dates share the plan again.
- Changing the plan or the interest rate rebuilds the schedule from the invoice's total and moves the due date to the last payment date. Payments already collected stay on the invoice and still count against the balance.
- There's no Due on field while a plan is in use — the due date comes from the final payment date rather than being typed in.
The term's plan
The plan and payment method a family is on for a term are recorded on the invoice new charges land on — the one badged New charges land here. Change the plan in Edit invoice on that invoice (or the autopay card with Turn on autopay) and every later enrollment into the same term lands on it, on the same plan, without asking again. That is also what the next autopay run starts from.
A second invoice — one from a split, or one for a fee due on its own date — keeps its own plan and is edited on its own, so changing it never moves the term's plan or the other invoice.