A term organizes your classes and programs into a time frame — a quarter, a semester, or an entire school year, depending on how you run your academic calendar. Every class and program belongs to a term, and students register for a term before (or while) enrolling.
Create a term
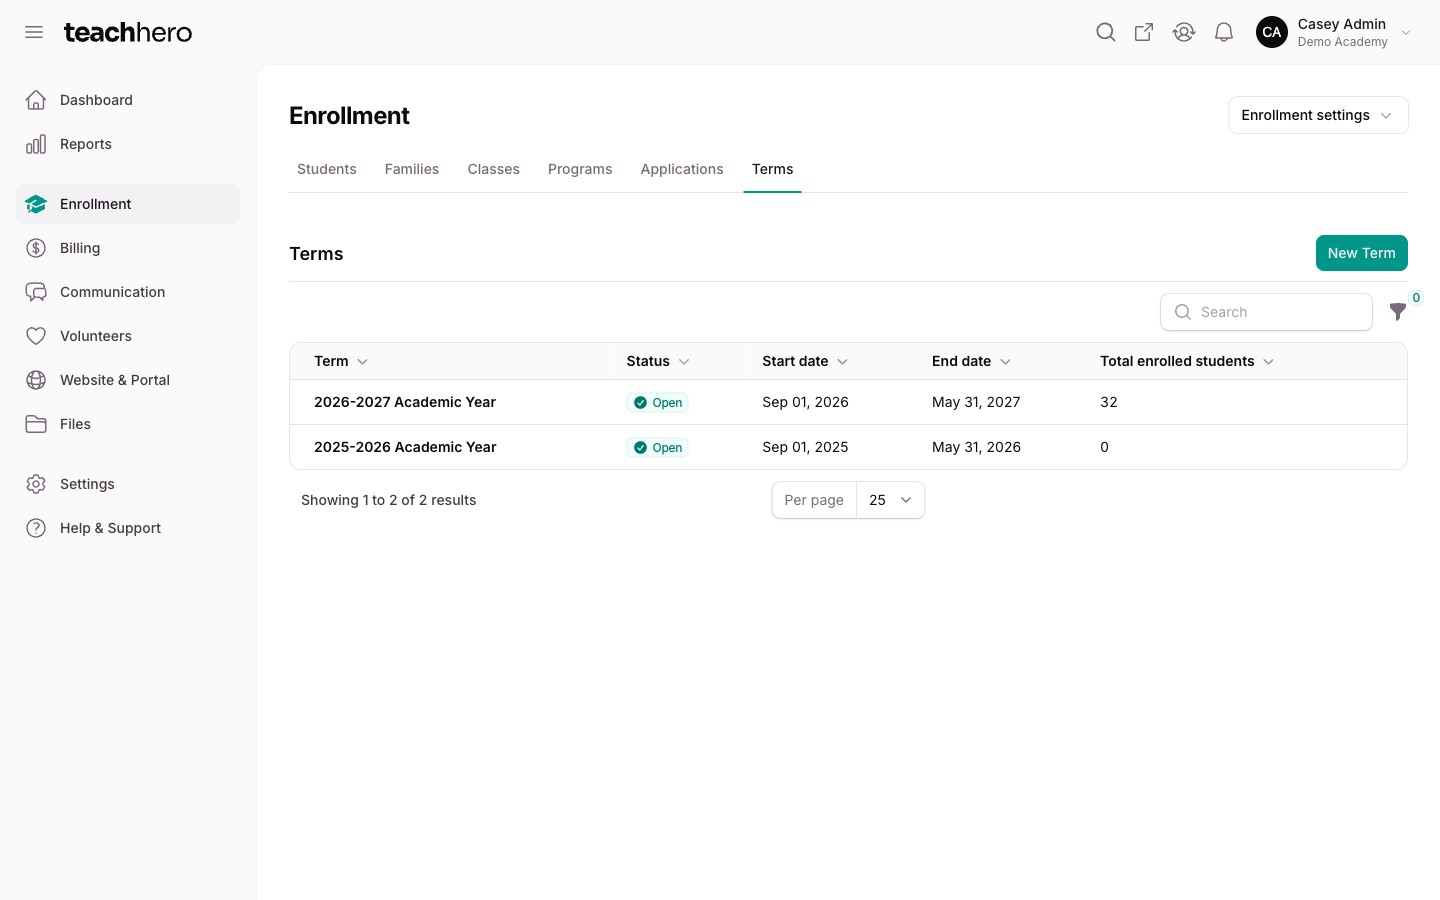
- Go to Enrollment → Terms.
- Click New term.
- Enter a Term name — e.g. "2026–2027 School Year" or "Fall Semester".
- Pick a Start date and End date.
- Enter Seats — the maximum number of students that can register. Registration closes automatically when the term is at capacity.
- Check the Eligible student levels and Eligible age groups that can register, or leave them empty to let anyone register. (Each appears only once you've defined levels or age groups.)
- Click Create term.
You can also choose Create term from the term selector in the heading of the Classes or Programs list. It opens the same page.
Note: New terms are created with their enrollment status set to Closed and are private (unpublished). Families can't see or register for the term until you open enrollment and publish it — see below.
Edit a term's enrollment settings
Open the term and click Edit term. Besides the name and dates, you can set:
- Enrollment status — Open, Closed, or Full. Only Open terms accept registrations.
- Seats — registration closes when at capacity.
- Require pre-registration — when ON, families must register for this term before enrolling in its classes or programs. When OFF, enrolling in a class or program registers them automatically.
- Eligible student levels and Eligible age groups — who can register. A student qualifies by matching any listed level or age group (age is checked automatically from their date of birth); leave both empty to open registration to everyone. Admins can override by enrolling directly. See Levels, Age Groups & Promotion.
Terms don't send a welcome email. Set one up on each class or program instead — see Automatic Enrollment Email.
Publish a term
New terms start as drafts only admins can see. To let families see the term on your school's website:
- Open the term.
- Click Manage → Publish.
- Confirm with Publish.
Use Manage → Unpublish to hide it again.
The term page
Open a term from the Terms list. At the top, Enrollment Overview shows seats filled, enrollment status, and the eligible student levels and age groups. Below it you'll find these sections:
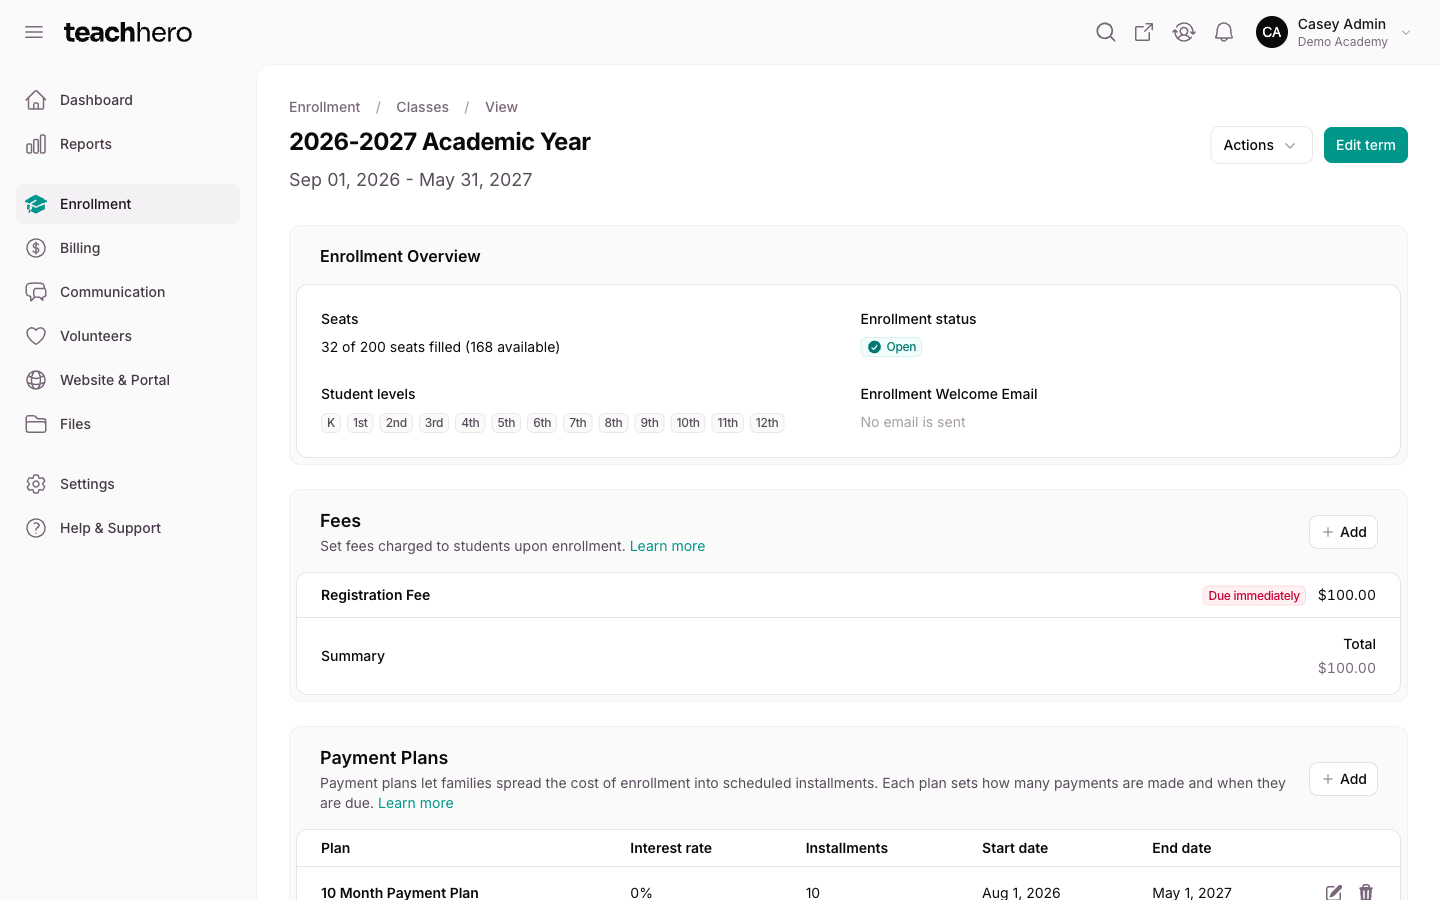
Fees & Discounts
Fees are charged to each student when they register for the term. Click Add, choose the Fee (or create a new one from the field), set the Amount, and choose when it's Due: Immediately at checkout (like a deposit), On a specific date (its own dated invoice; pick the Due date), Deferred to payment plan, or With the first installment. The first two are excluded from payment plans — see Managing Fees for how each option is billed.
Each fee can also carry its own Discounts. Click Add discount inside the fee to add one, choose the rate (flat amount or percentage), and optionally a condition under Applied when: Student is (Sibling, New, or Returning) or Student enrolls before a date. Leave the condition empty to always apply it.
Note: Changing or removing fees and discounts only affects new registrations — existing enrollments keep what they were charged.
Payment Plans
Payment plans let families spread the term's fees into scheduled installments. Click Add, name the plan, optionally set an Interest rate, and add an installment date for each payment. Fees set to Immediately at checkout or On a specific date are never included in a plan.
Plans added here cover everything a student enrolls in for this term — the term's own fees plus any class and program fees — so the term is the only place you set them up. See Payment Plans.
Enrollment Forms
Required forms students must complete during enrollment, before checkout. See Enrollment Forms.
Enrollment Periods
Control exactly when registration opens — for everyone, or early for selected groups. See Enrollment Periods.
Copy a term
Setting up next year? Copy an existing term instead of rebuilding it:
- Open the term and click Manage → Copy term.
- Enter the new term's name and dates.
- Click Copy term.
TeachHero copies the term's settings and all of its classes and programs in the background. It can take a few minutes for everything to appear.
Note: Any fee with a specific due date is copied with that same date. Because due dates are specific to a term, review your fees after copying and update the dates for the new term — see Managing Fees.
Archive or delete a term
- Manage → Archive hides a past term from your day-to-day lists without losing its history. Use Unarchive to bring it back.
- Manage → Delete is only available while nobody is enrolled in the term or any of its classes. Confirm with Delete term.
Warning: Deleting a term also deletes its fees, discounts, and payment plans. This cannot be undone.