Every submitted student application appears as an applicant for your school to review. Approving an applicant makes them a student so their family can enroll them; denying stops the process.
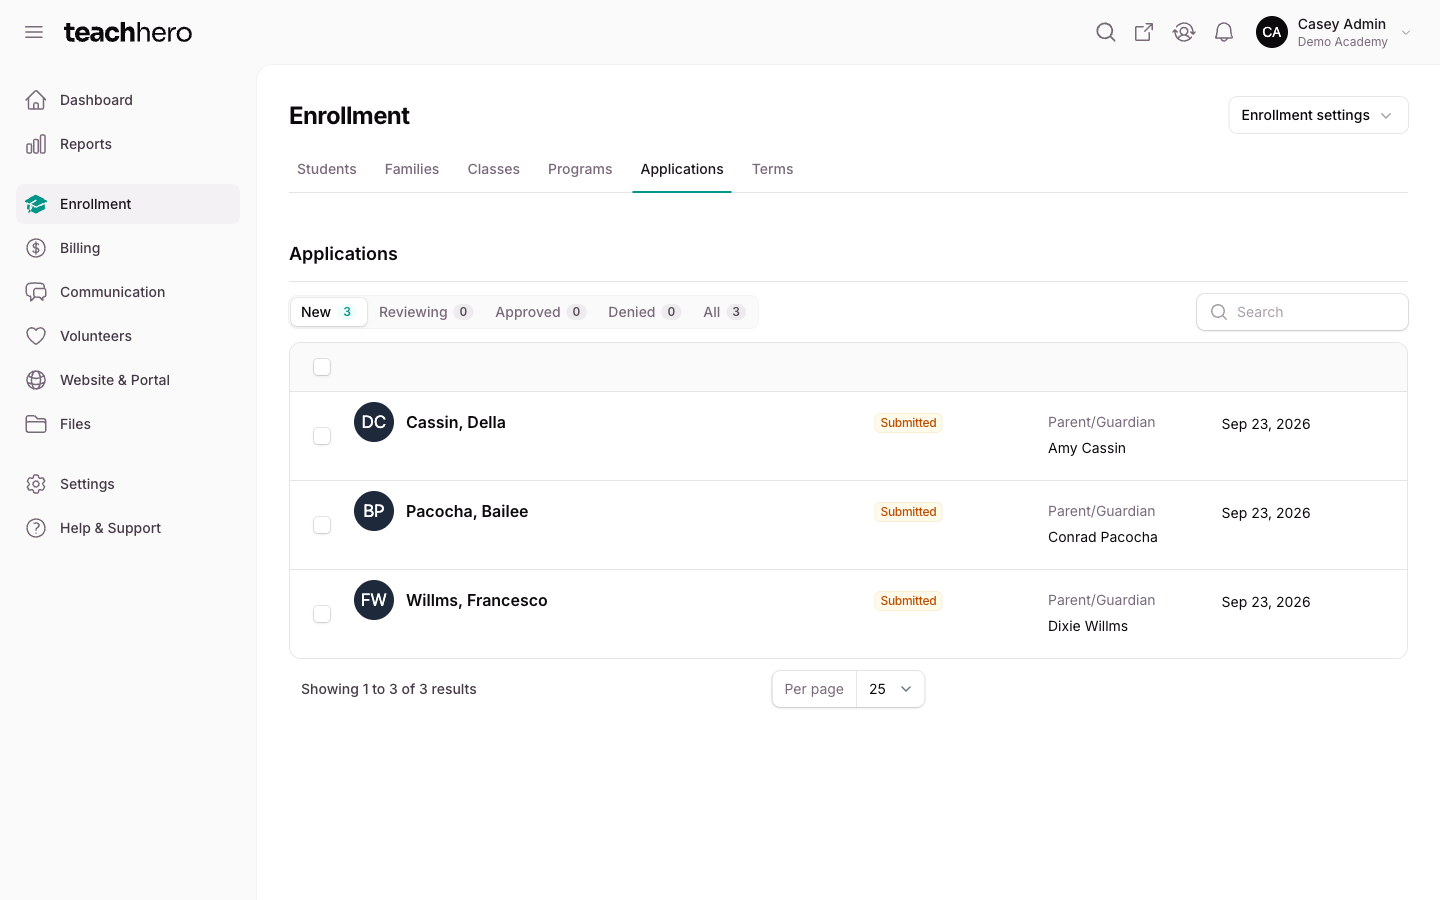
To view applicants, go to Enrollment → Applications.
Understand applicant statuses
Use the pills above the list to filter by status — Needs review, New, Reviewing, Approved, Denied, or All — each with a count. The list opens on New. Needs review combines New and Reviewing, so it shows everything still waiting on a decision.
- Submitted — filled out and submitted, ready for review. These are what the New filter shows.
- Reviewing — being looked at by a school admin.
- Approved — admitted; the family can begin enrollment.
- Declined — denied; the applicant can't be enrolled (shown by the Denied filter).
- In progress — started by a parent but not yet submitted. These don't appear in the Applicants list at all (even under All) until the family submits; the parent can see and resume them from their portal home page.
Each row shows the student's name and photo, the parent/guardian, their status, and the submission date. Use search to find an applicant by name.
Review an application
Click an applicant to open their application. You'll see the student, parent/guardian, and family information the family provided, alongside the application's status, start and submission dates, and — if you charge an application fee — the fee, receipt(s), and any related invoice.
The Forms section lists each form attached to the application with its status; click View on a form to read the family's responses.
Approve or deny an applicant
On a submitted application:
- Click Approve or Deny at the top of the application page.
- In the confirmation modal, use the Send email toggle (labeled Customize email if you've already enabled automatic emails in your application settings) to email the family, and edit the message if you like. If you turn on Send email for an approval, the message can't be empty.
- Click Approve application (or Deny application) to confirm. You'll see an "Application accepted" or "Application denied" message.
Approving creates a student: the applicant gets the Student role and a student number, the parent gets the Parent/Guardian role, and the family can start enrollment. Denying marks the application Declined and the family cannot enroll that student.
Note: If your application settings have "Require application to be reviewed before approval." turned off, applications are approved automatically the moment they're submitted — you'll only see them under Approved.
Change an applicant's status
To move an applicant back into your review pipeline (for example, to re-review a denied application):
- Open the applicant.
- Click the Actions button and choose Change status.
- Pick a New status — Submitted or Reviewing.
- Click Update status.
Change status is available on any application that has been submitted, including approved and denied ones.
Download a PDF of an application
- Open the applicant.
- Click the Actions button and choose Download PDF.
- A PDF copy of the application is generated and downloaded to your computer.
Archive or delete an applicant
The same Actions menu lets you Archive an applicant to tidy the list without losing the record (you can unarchive later).
Warning: Delete permanently removes the application. If a parent has an in-progress duplicate you want gone, prefer letting them cancel it themselves, or archive instead.
Note: Want an email whenever a new application comes in? Go to Settings → Personal profile → Notifications and turn on New Applicants.