Before a new student can enroll, their family applies for admission through your school's online student application. TeachHero creates a default application for every school, and the application page is always live — there's no switch to turn it on. This page shows you how to tailor it to your admissions process. Families apply at your school's /portal/application address (see Submitting Student Applications).
Approved applicants become students at your school, but they don't count toward your actively enrolled student total until they're actually enrolled.
Open the application settings
- Go to Enrollment → Applications.
- Click Application settings.
If you haven't received any applications yet, the Applications page also shows a Customize Application button that takes you to the same place.
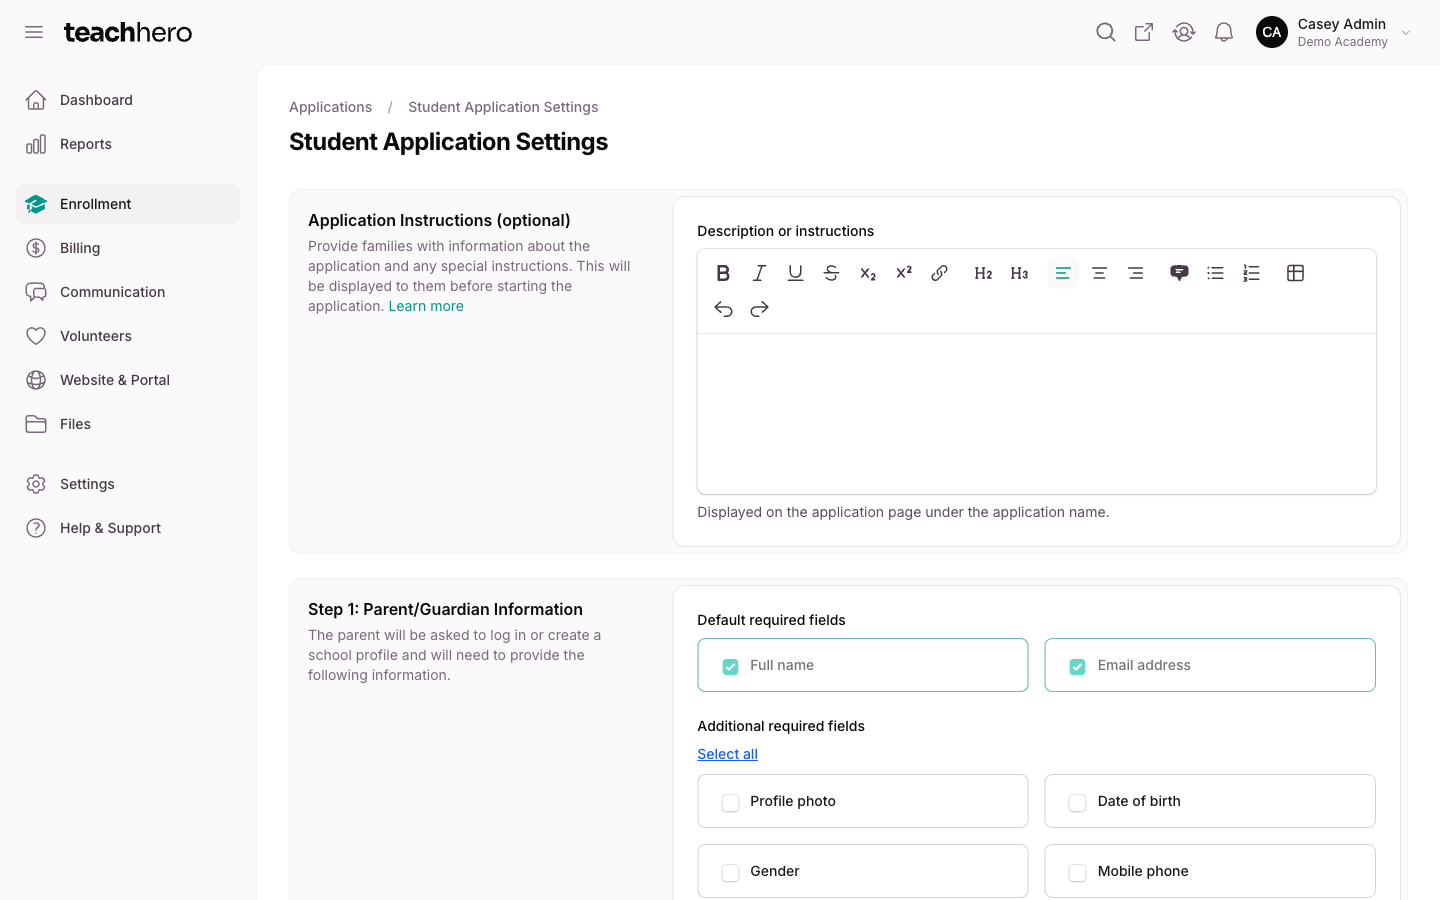
The Student Application Settings page mirrors the steps families walk through, so you can review it top to bottom: Application Instructions (optional), Step 1: Parent/Guardian Information, Step 2: Student Information, Step 3: Additional Forms, Application Submission, and Approval Process. A single Save changes button at the bottom saves every section.
Add instructions for families
In the Application Instructions (optional) section, use the Description or instructions editor to tell families anything they should know before applying — deadlines, what to have ready, who to contact with questions. This text is shown on the application page before a family starts a new application.
Choose parent/guardian fields
By default the application only asks the parent/guardian for the essentials: Full name and Email address. Under Additional required fields, tick anything else you want to require:
- Profile photo
- Date of birth
- Gender
- Mobile phone
- Address
The parent is also always asked for their relationship to the student (mother, father, or guardian).
Choose student fields
In Step 2: Student Information, the default required fields are Full name, Date of birth, and Student level enrolling into (the levels you've set up with Manage levels on any term, class, or program). You can additionally require:
- Profile photo
- Gender
- Mobile phone
- Primary email
- Address
Attach additional forms
Use Step 3: Additional Forms to collect anything beyond the standard profile fields — health information, references, agreements, and so on. Forms are built in the form builder first (see Creating Custom Forms). Only family forms can be attached to the application.
- Click Add form.
- Pick a form from the Select a form dropdown.
- Turn on Required once per family if one response should cover all students in a family. Leave it off to require the form for every applicant.
Families must complete every attached form before they can submit the application. Drag the rows to reorder the forms.
Set the application fee and confirmation message
The Application Submission section controls what happens when a family submits:
- Add application fee — charge a one-time fee that must be paid before the application can be submitted. See Application Fees for the full details, including how to keep applications free.
- Confirmation message — the message families see right after submitting. It starts as "Thank you for submitting your application." and is required.
Configure the approval process
In the Approval Process section:
- Use Require application to be reviewed before approval. to control whether you review each application. If disabled, applications are automatically approved when submitted.
- Turn on Send an email message to the applicant if approved and write the Acceptance message to email families when their application is approved. If you've turned off review, the acceptance message is required — it's what families see immediately after submitting.
- Turn on Send an email message to the applicant if denied and fill in Customize the denial message to email families when an application is denied.
Note: With auto-approval on, every submitted applicant immediately becomes a student and their family can start enrollment right away. Keep review on if you need to vet applications first.
Save your changes
Click Save changes at the bottom of the page. Your changes apply to new applications immediately.